Substitutional Point Defects in Graphene.
Introduction.
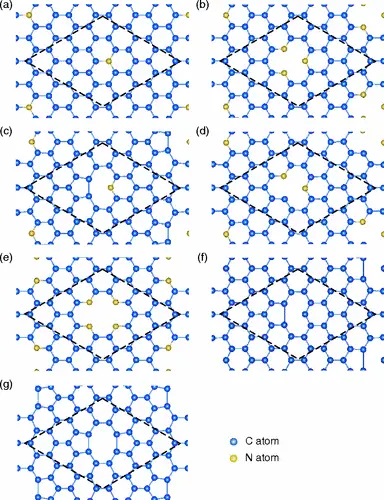
This tutorial demonstrates the process of creating materials with substitution defects, based on the work presented in the following manuscript, where nitrogen defects in graphene are studied.
Manuscript
Yoshitaka Fujimoto and Susumu Saito, "Formation, stabilities, and electronic properties of nitrogen defects in graphene", Physical Review B, 2011. DOI: 10.1103/PhysRevB.84.245446. 1
We use the Materials Designer to create a supercell of graphene, identify the crystal site positions for defects, and introduce nitrogen atoms and vacancies accordingly.
We will focus on creating graphene-nitrogen structures from FIG. 1. Specifically, the material from FIG. 1. b) of the paper:
1. Create Graphene Supercell.
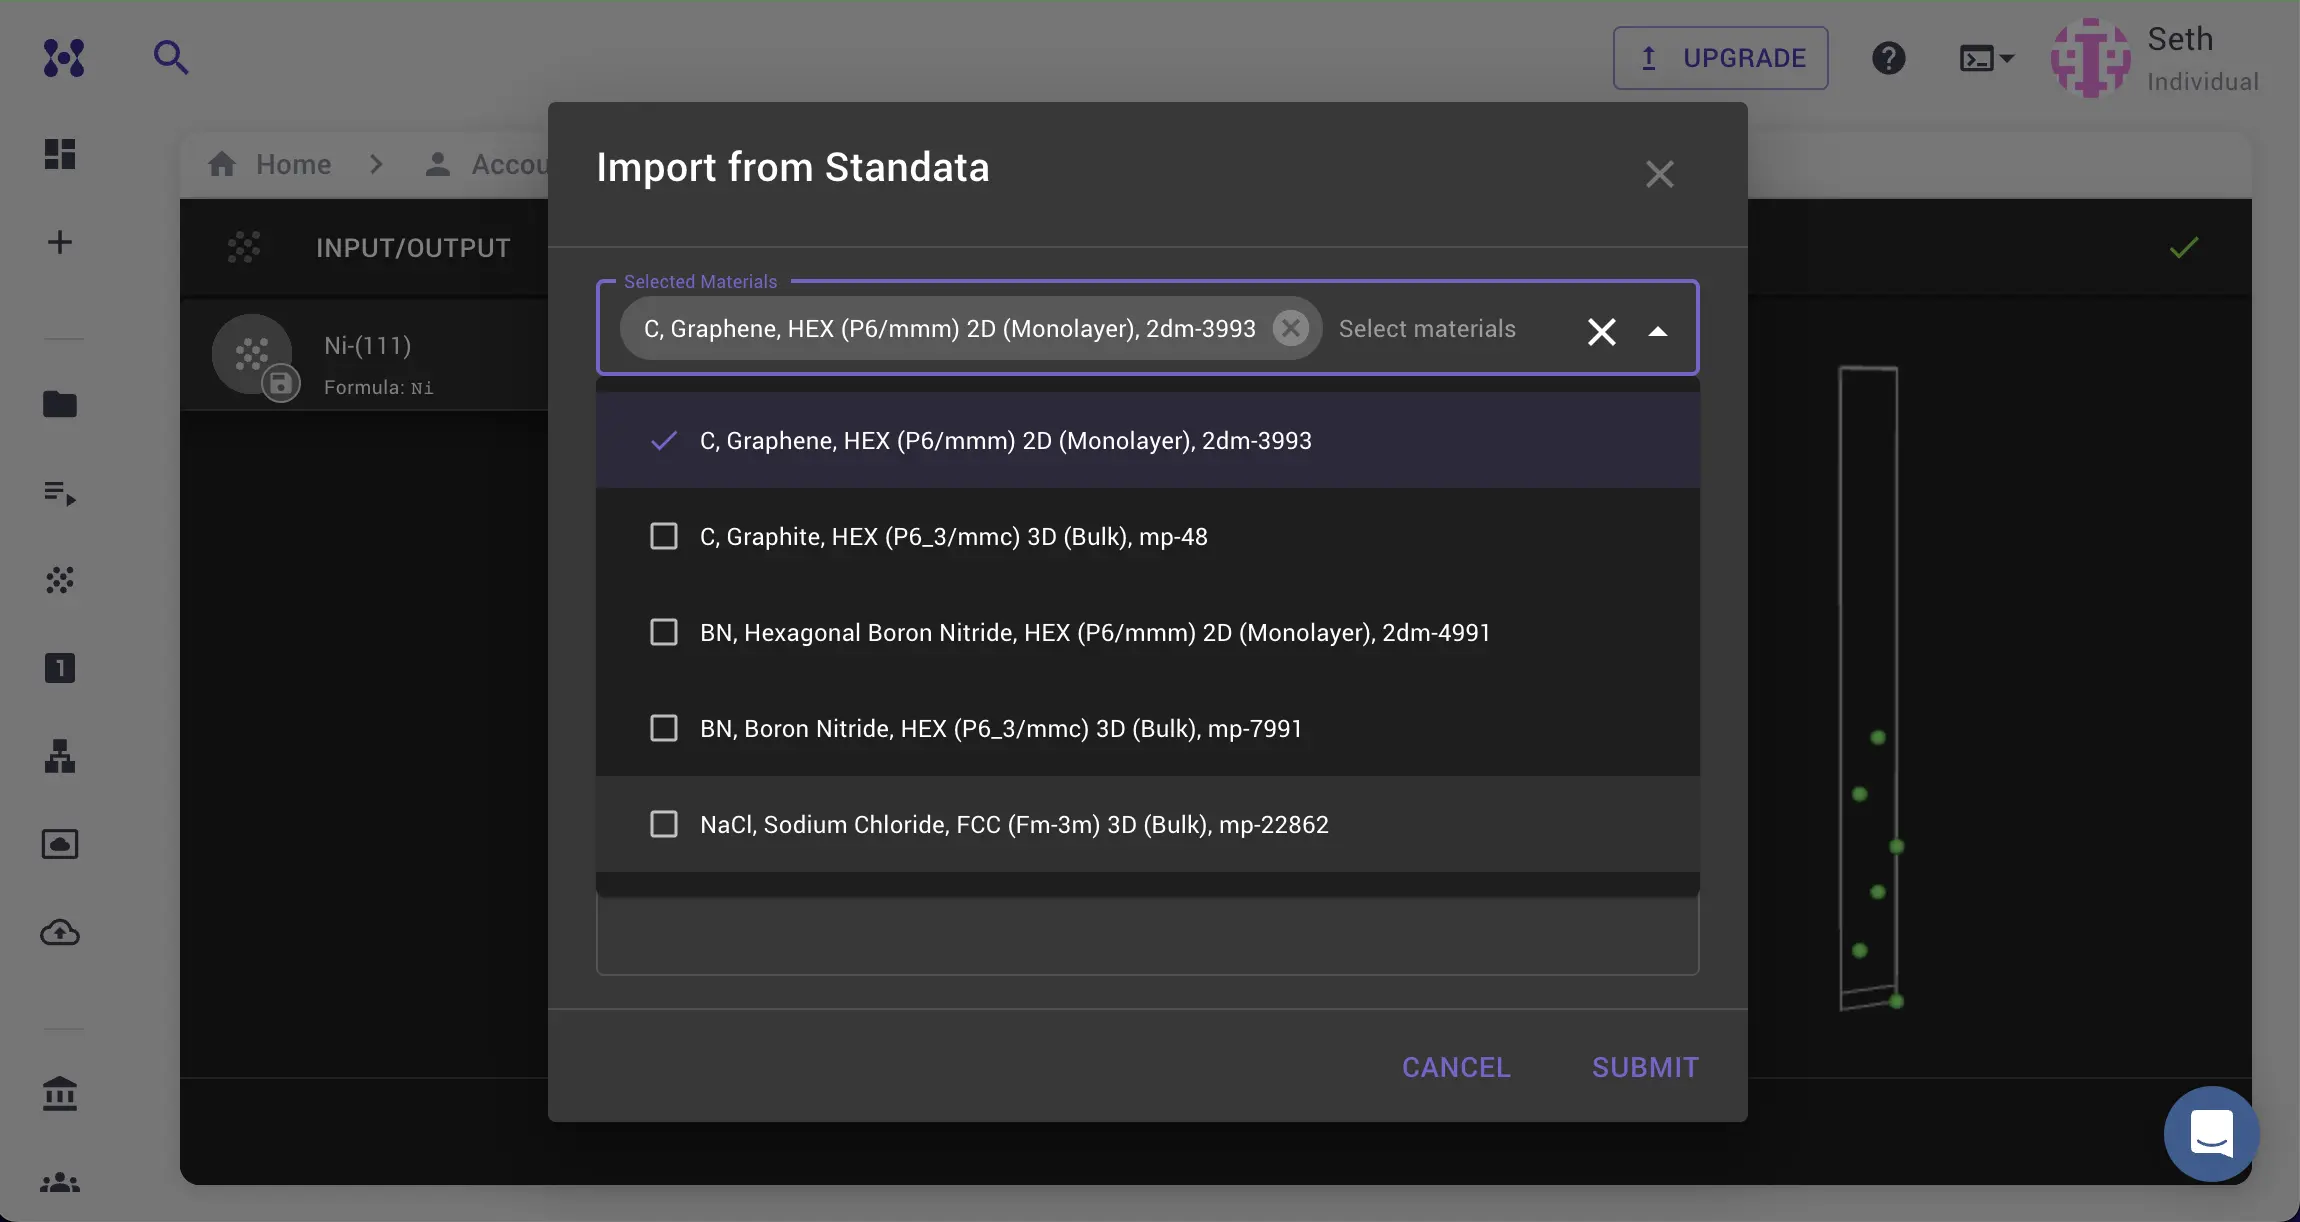
First, we navigate to Materials Designer and import the graphene material from the Standata.
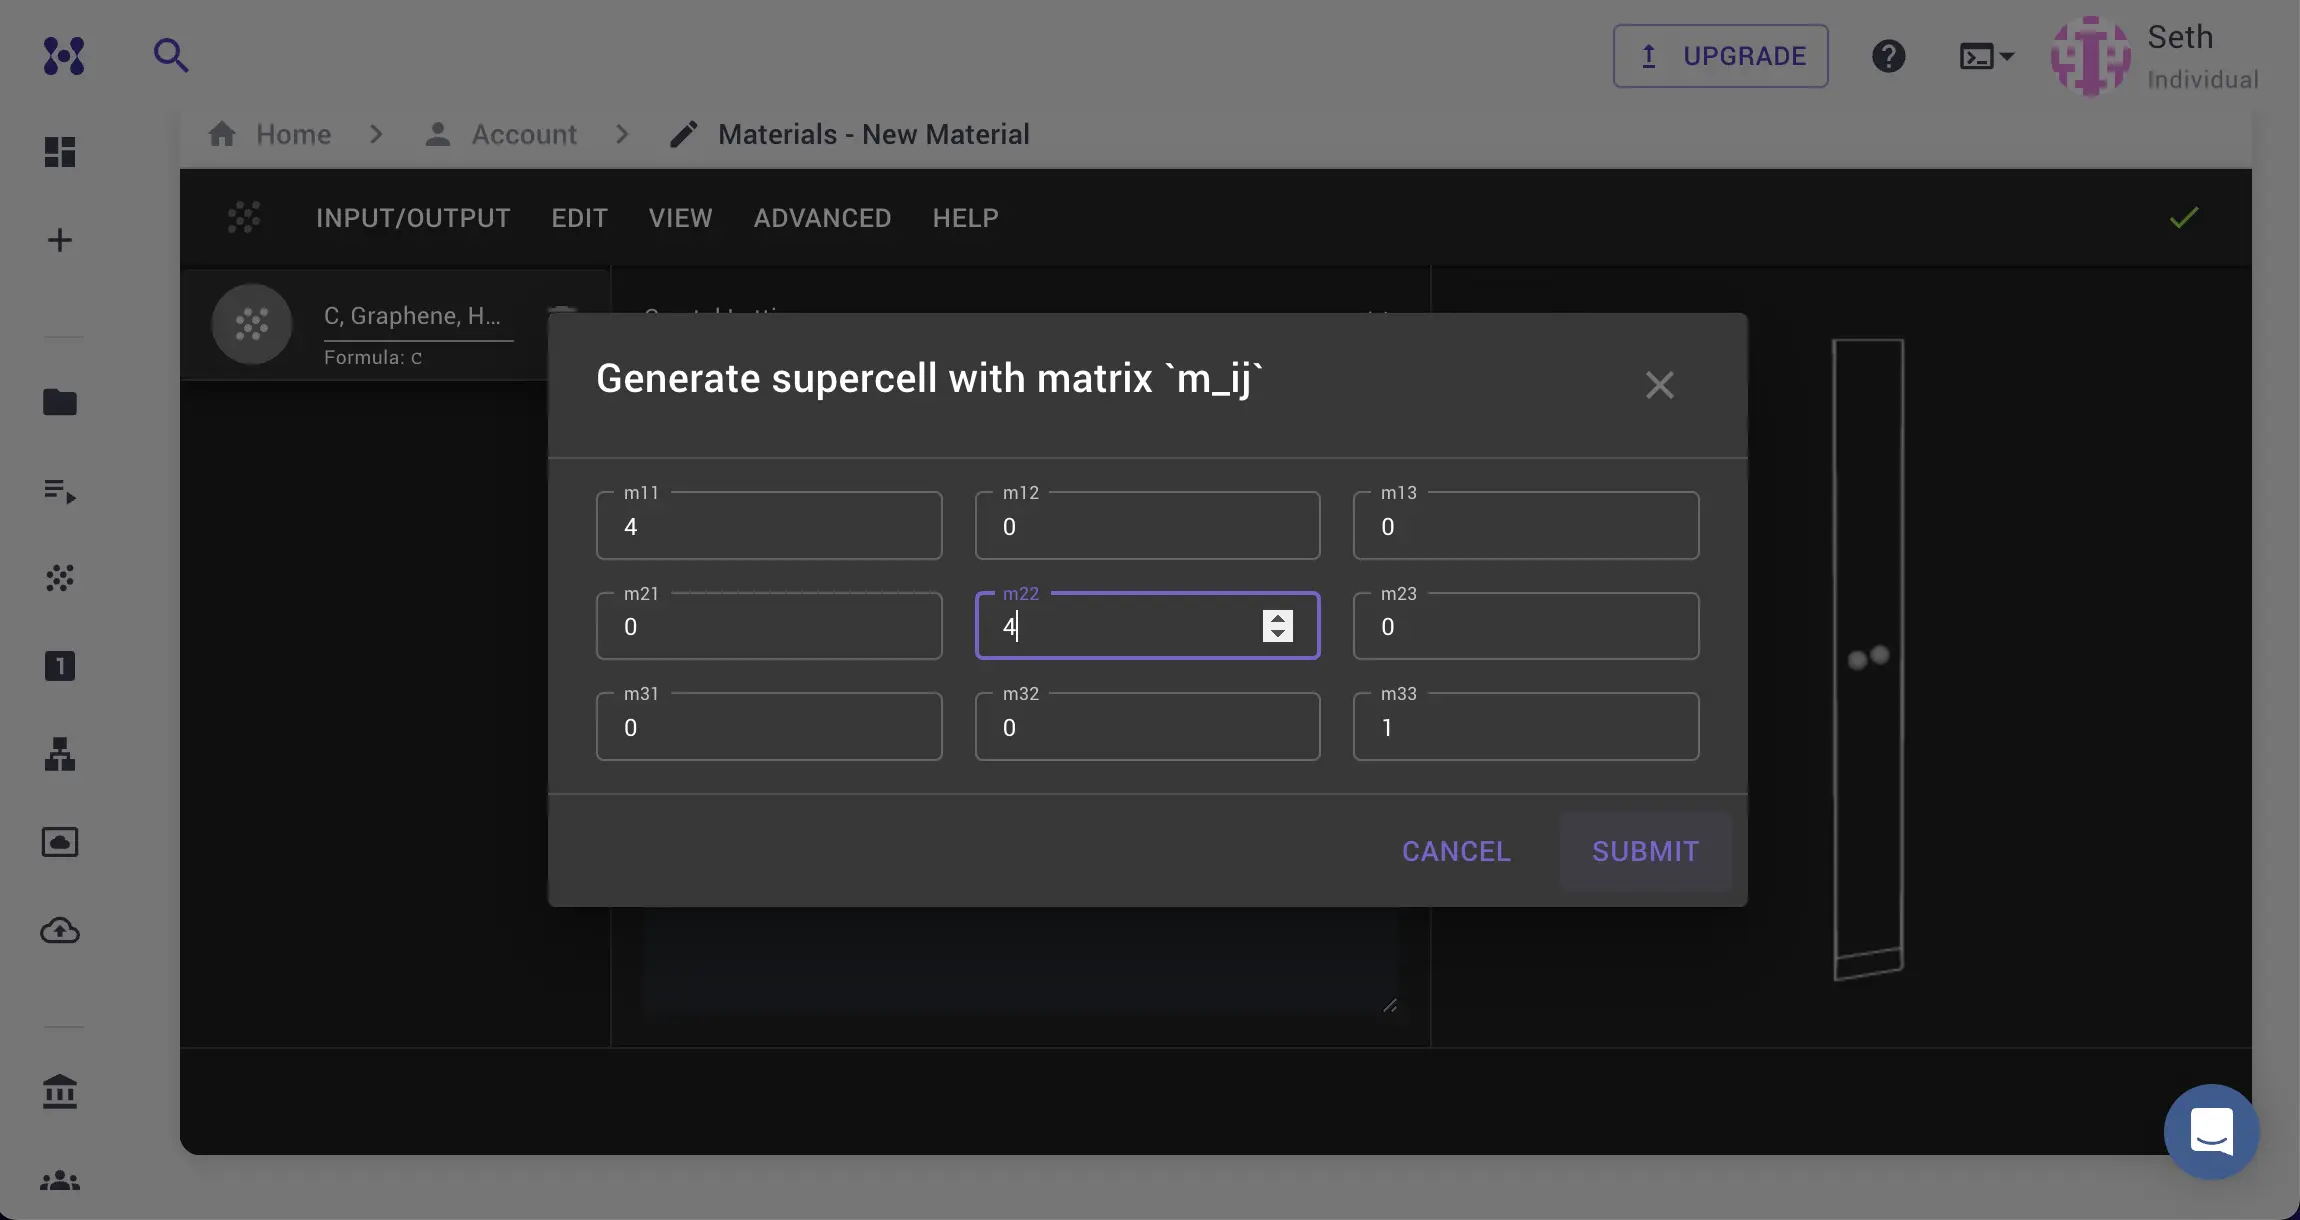
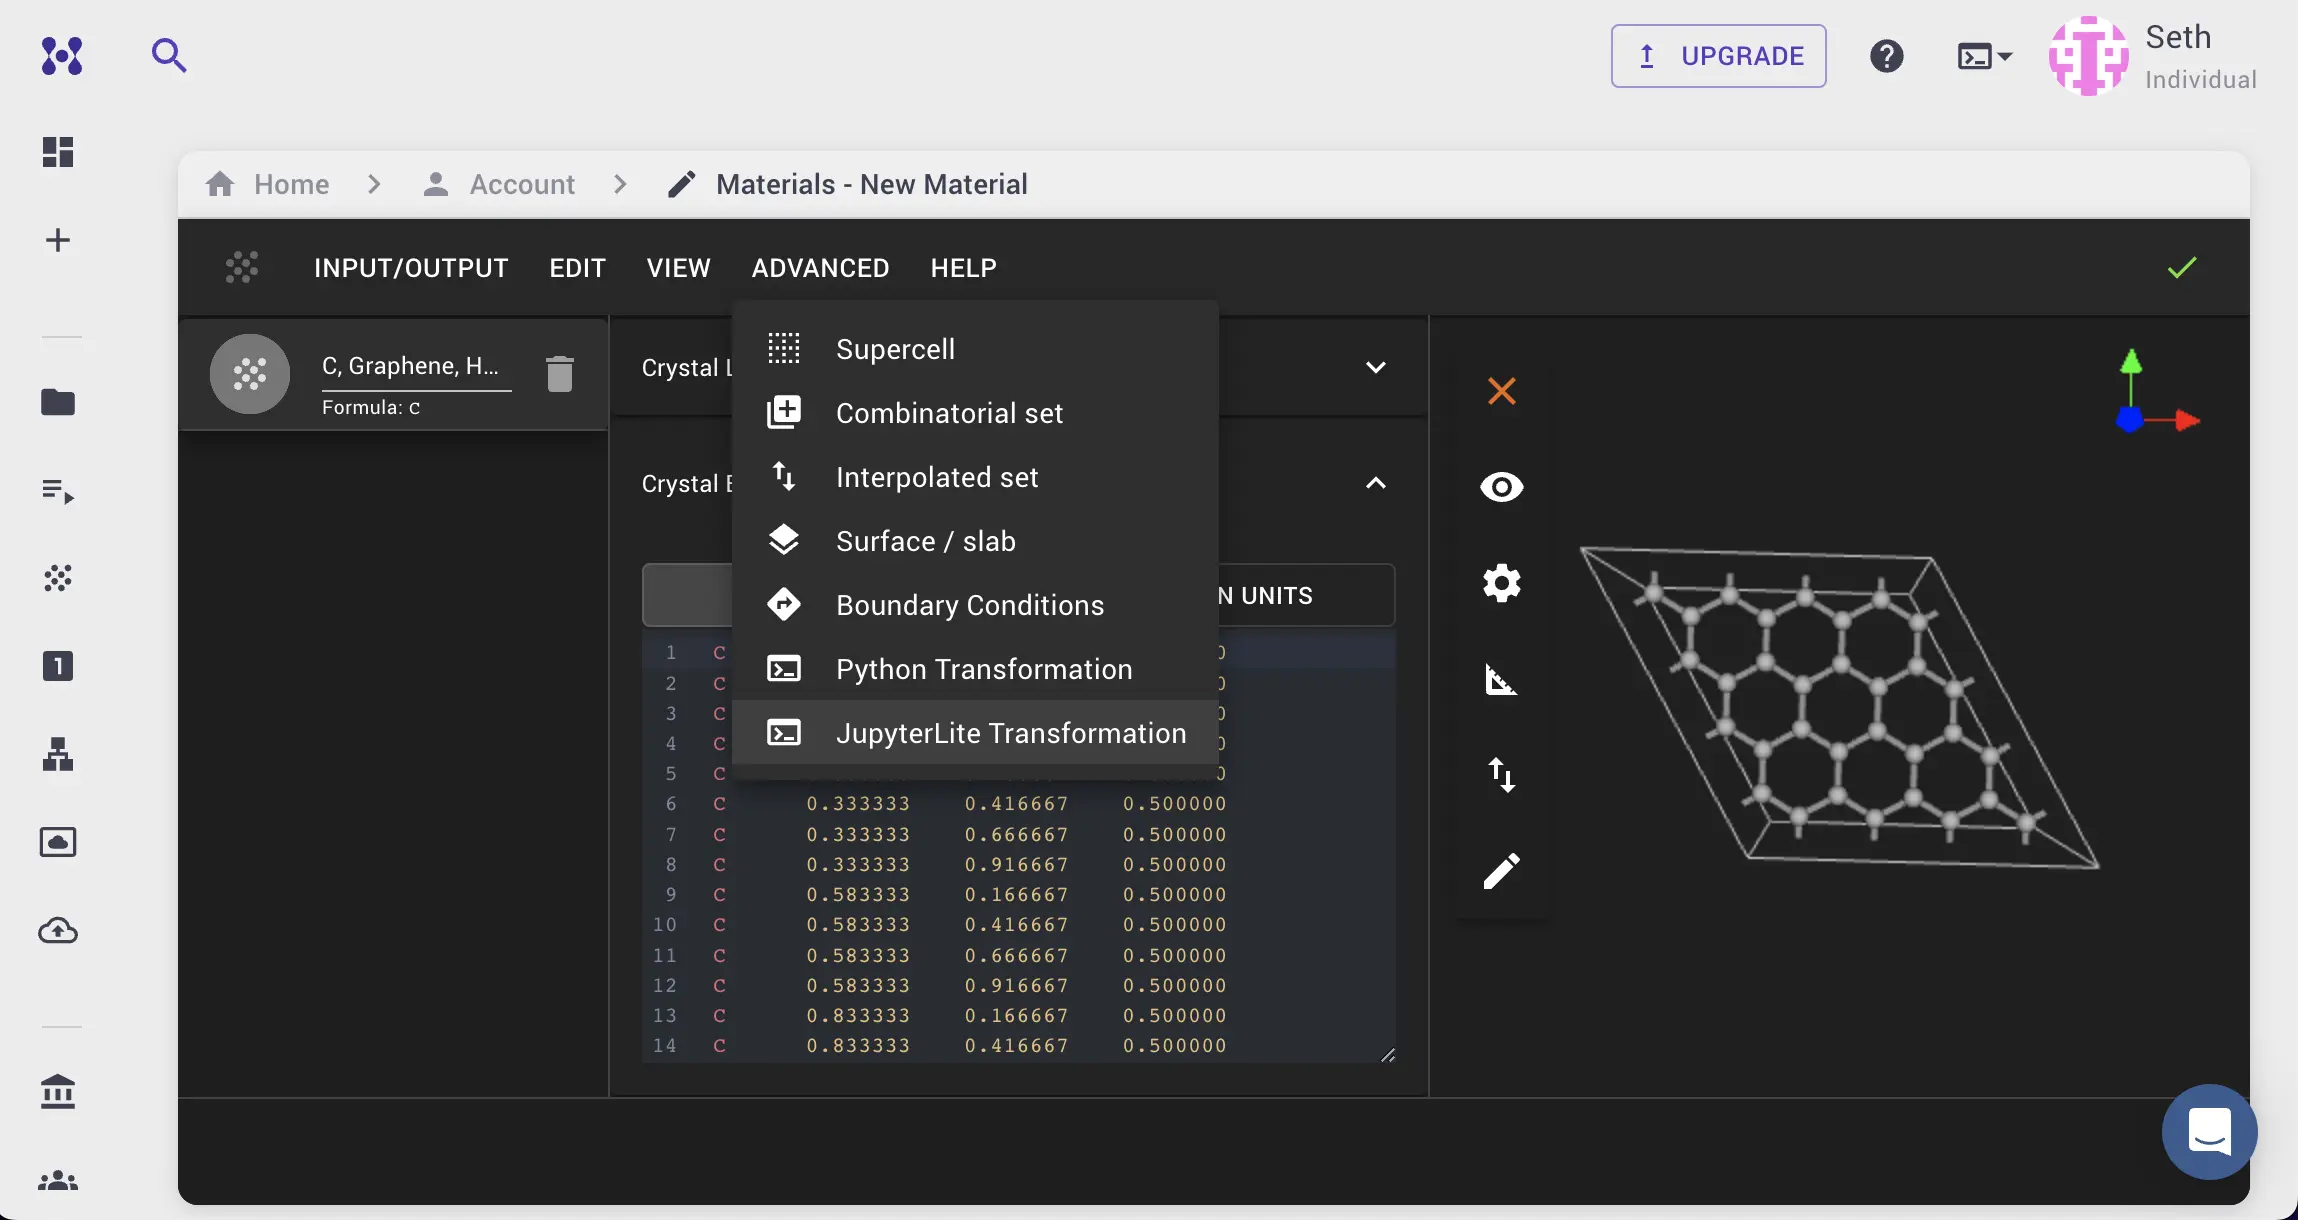
We then use the Advanced menu to create a supercell of graphene with a size of 4x4x1.
2. Identify Defect Sites.
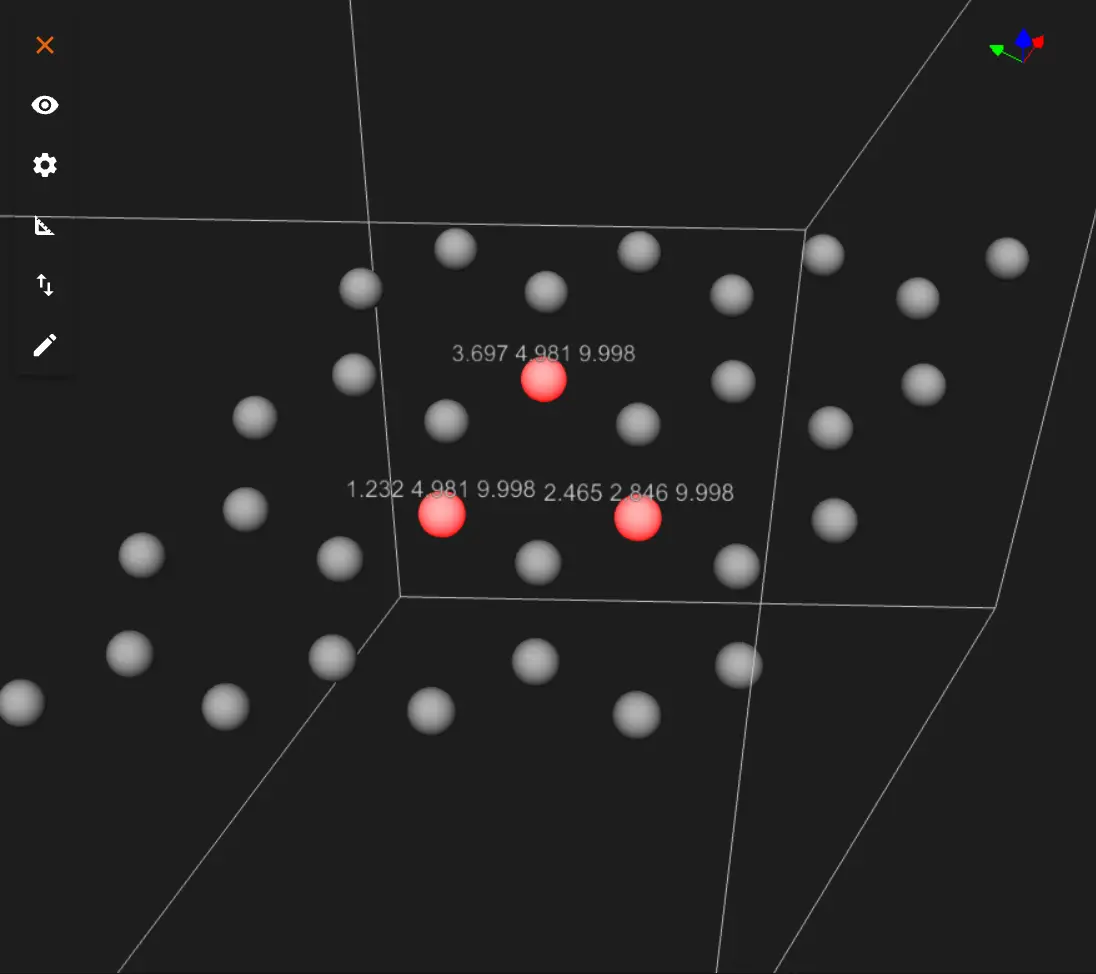
Next, we can toggle the coordinates measurement in the editor to identify the crystal site positions for the defects.
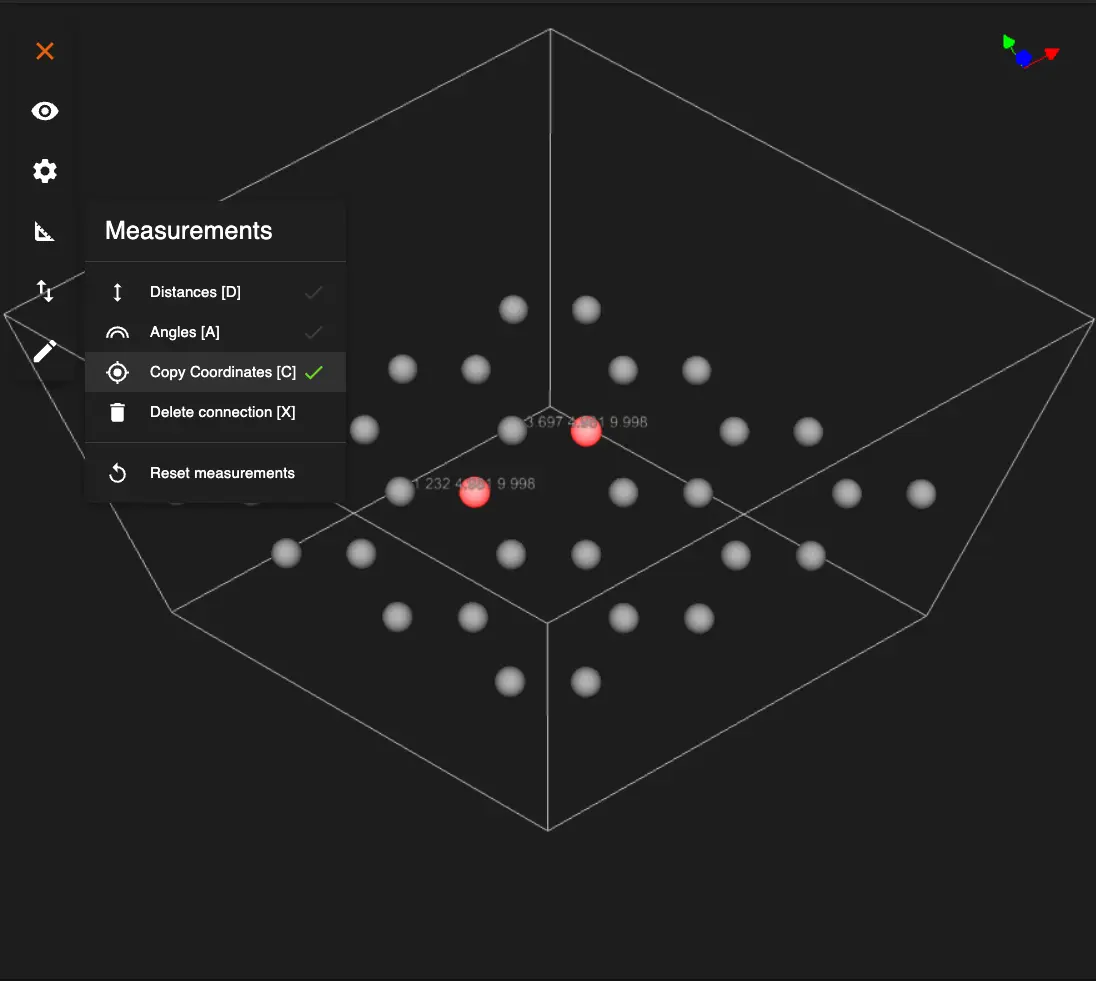
Clicking on each atom will copy the coordinates of the atom to the clipboard as an array, which can then be pasted into the cell of the notebook and used to assign the defect coordinates.
3. Create Nitrogen Defects and Vacancies.
For the defect creation, we will use the JupyterLite environment with the corresponding notebook.
3.1. Launch JupyterLite Session.
Select the "Advanced > JupyterLite Transformation" menu item to launch the JupyterLite environment.
3.2. Open create_point_defect.ipynb notebook.
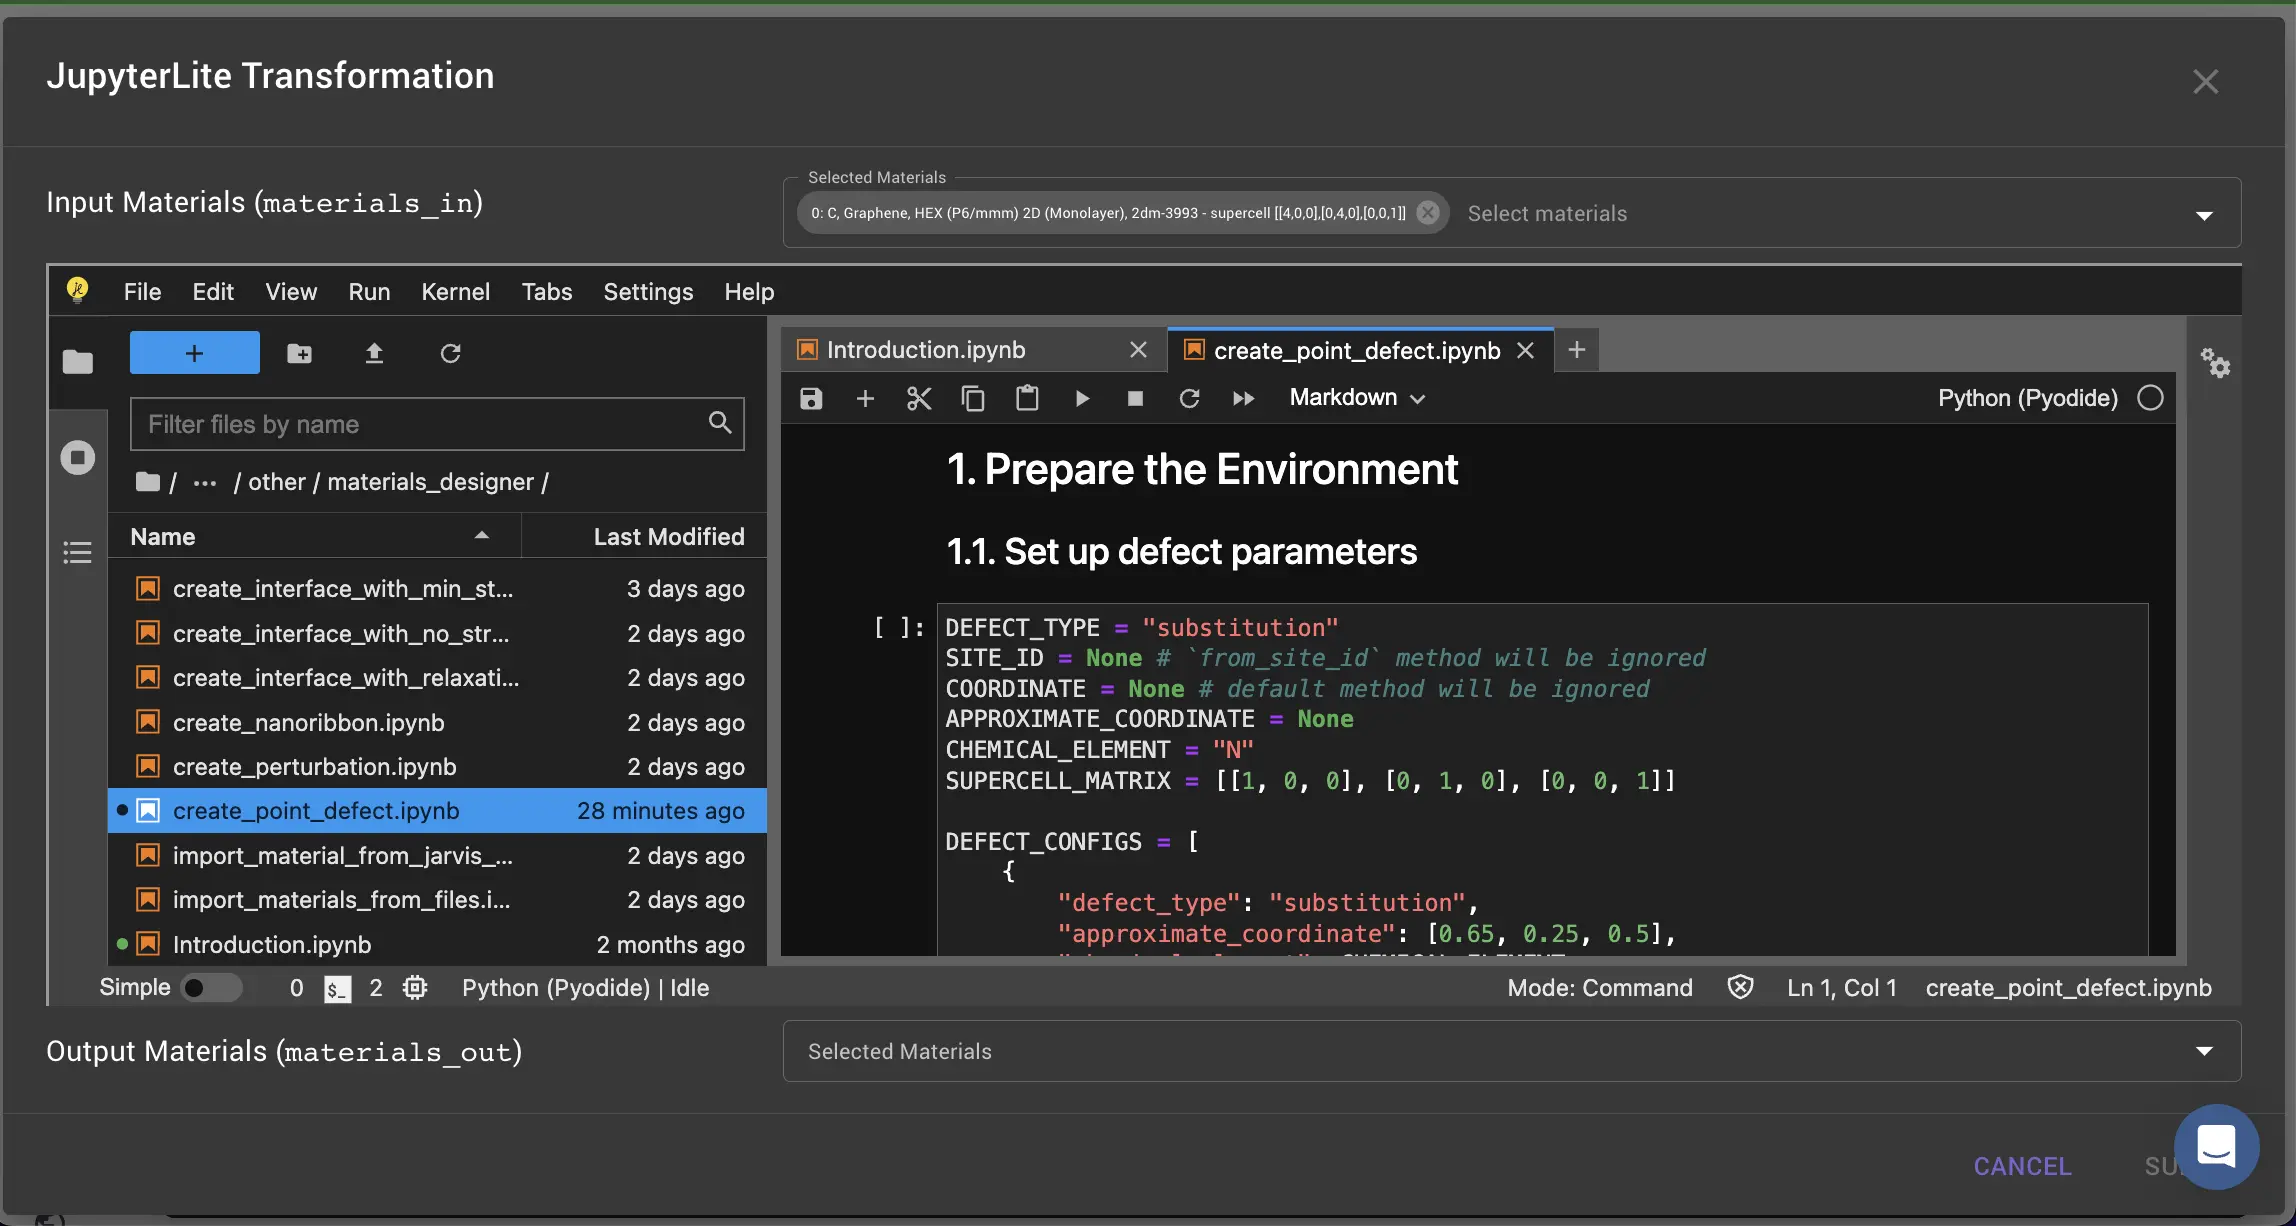
Find create_point_defect.ipynb in the list of notebooks and click/double-click open it.
3.3. Open and modify the notebook.
Next, edit create_point_defect.ipynb notebook to modify the parameters by adding a list of defect configuration objects containing the approximate coordinates of the atoms to replace.
Copy the below content and edit the "1.1. Set up defect parameters" cell in the notebook as follows:
# Selected material will be used as a unit cell to create a supercell first.
SUPERCELL_MATRIX = [[1, 0, 0], [0, 1, 0], [0, 0, 1]]

DEFECT_CONFIGS = [
    {
        "type": "substitution",
        "coordinate": [4.9, 2.85, 10],
        "element": "N",
        "placement_method": "closest_site",
        "use_cartesian_coordinates": True
    },
      {
        "type": "substitution",
        "coordinate": [3.7, 4.9, 10],
        "element": "N",
        "placement_method": "closest_site",
        "use_cartesian_coordinates": True
    },
      {
        "type": "substitution",
        "coordinate": [2.45, 2.85, 10],
        "element": "N",
        "placement_method": "closest_site",
        "use_cartesian_coordinates": True
    },
      {
        "type": "vacancy",
        "coordinate": [3.7, 3.55, 10],
        "placement_method": "closest_site",
        "use_cartesian_coordinates": True
    },
]
Here's the visual of the updated content:
4. Run the Notebook.
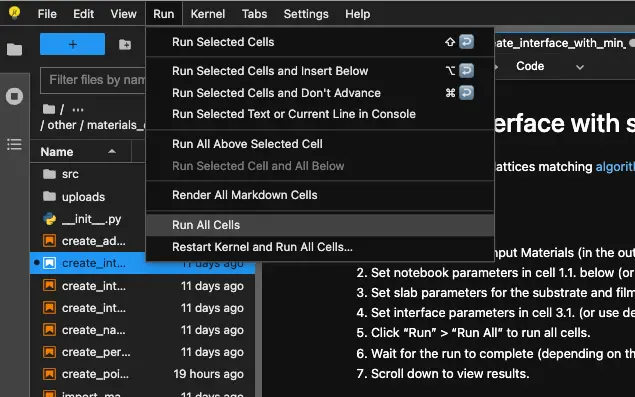
Run the notebook by clicking Run > Run All in the top menu to run cells and wait for the results to appear.
5. Analyze the Results.
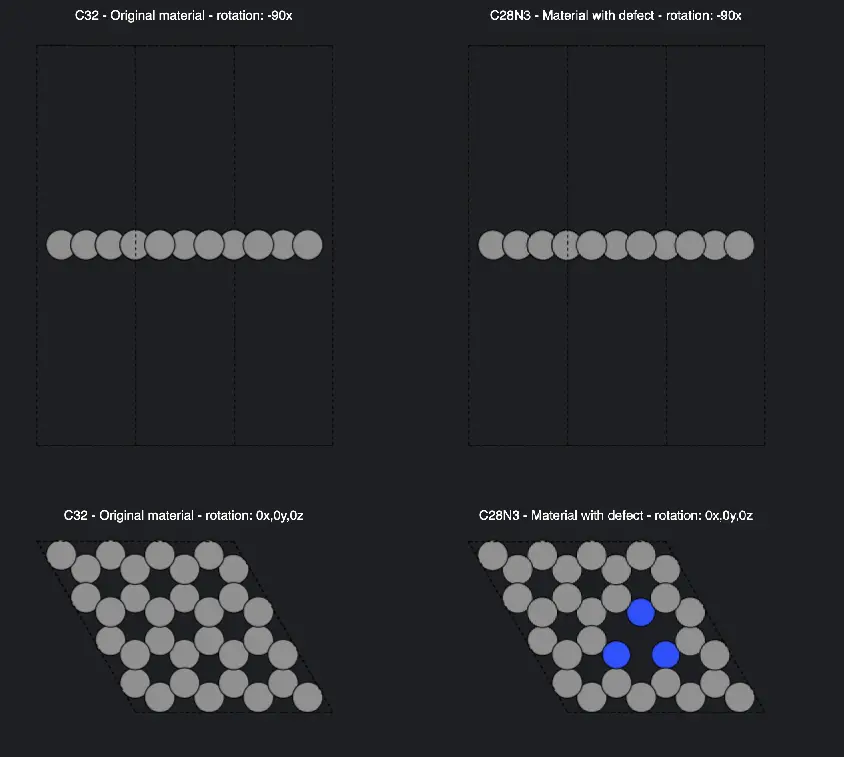
After running the notebook, the user will be able to visualize the structure of Graphene with substitution defects.
6. Pass the Material to Materials Designer.
The user can pass the material with substitution defects in the current Materials Designer environment and save it.
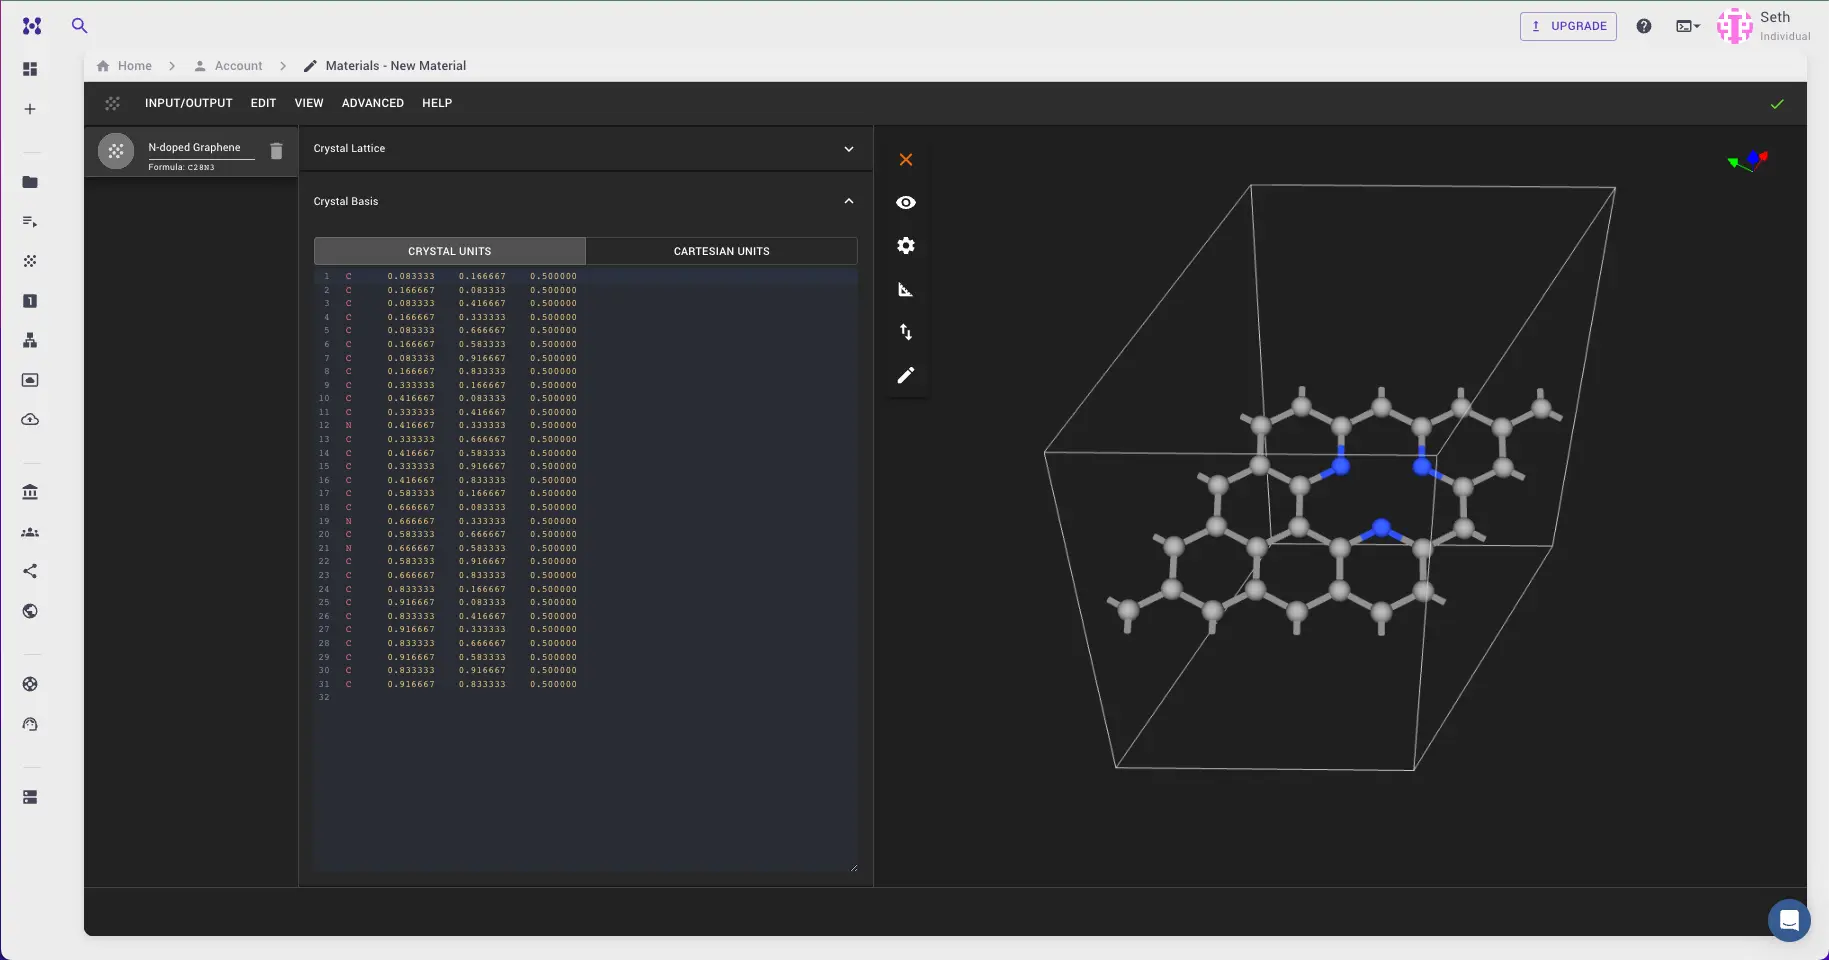
Or the user can save or download the material in Material JSON format or POSCAR format.
Interactive JupyterLite Notebook.
The following JupyterLite notebook demonstrates the process of creating materials with substitution defects in graphene. Select "Run" > "Run All Cells".
References.
-
Yoshitaka Fujimoto and Susumu Saito. Formation, stabilities, and electronic properties of nitrogen defects in graphene. Phys. Rev. B, 84:245446, Dec 2011. URL: https://link.aps.org/doi/10.1103/PhysRevB.84.245446. ↩